
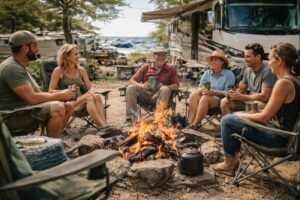
If there’s one piece of camping magic that never gets old for us, it’s gathering around a cozy campfire at the end of a long hiking day. That gentle crackle, the warmth, the perfect spot for marshmallow roasting. Pretty much the heart of any RV or camper weekend. Still, building a campfire is more than just tossing some logs together. Doing it safely and efficiently makes a big difference in the campsite experience and helps keep everyone (and the outdoors) protected.
Whether you’re a new camper or you’ve done this more times than you can count, getting the campfire right can be easy if you follow some basic steps. I’ll walk through what’s worked for us on our family trips, from our favorite RV parks in the Midwest to mountain sites out West. These practical tips will help you fire things up safely and enjoyably every time.
1. Choose the Right Fire Spot
Not every spot is fire friendly. Most campgrounds have designated fire rings or pits, and it’s really important to use those. If you’re somewhere that allows you to build your own, pick a spot at least 15 feet away from your RV, tent, and anything flammable like tall, dry grass or overhanging branches.
Checklist for Picking a Safe Fire Location:
- Look for a bare, clear area that’s not under trees or close to bushes.
- Never set up a fire where the wind can blow flames or embers toward campsites or picnic tables.
- Make sure there are no fire bans or restrictions. Check with campground staff or online before you set up anything.
Beyond just distance from tents and RVs, also glance up to ensure nothing is above your spot—tree cover can drop branches or limit ventilation, making a mess or creating an unsafe environment. Every park is different, so check for signs noting any changes to fire policy after storms or dry weather.
2. Gather the Right Materials
Having the right materials from the start makes the campfire building process smoother and a lot less smoky. I always collect three types of wood:
- Tinder: Small stuff like dry leaves, pine needles, or tiny twigs (no thicker than a pencil).
- Kindling: Sticks a bit bigger than tinder (up to thumb thickness).
- Fuel Wood: Logs or larger branches that’ll keep things going once you get a flame.
Dry wood is key. Nothing kills a campfire mood like struggling with soggy logs. Whenever possible, use local wood bought at the campground or nearby stores to avoid spreading bugs and diseases between parks. It supports local businesses, too.
Quick Material Tips:
- A hatchet or saw can be really helpful for splitting kindling (check campground rules first).
- Store your wood pile away from the actual fire ring to keep things tidy and safe.
- Bring along a lighter or waterproof matches. Windproof lighters are pretty handy in a pinch.
Some folks also pack fire starters like cotton balls dipped in wax, dryer lint, or homemade cubes. These extras can make lighting up easy, especially after rain or in windy conditions.
3. Build Your Fire Structure
The way you set up the logs matters. There are a few go to shapes, but I’ve had the most luck with the simple teepee and log cabin styles:
- Teepee: Arrange the tinder in a small pile, stack kindling in a cone around the tinder, then add a few small logs around that. This style gets a flame going fast.
- Log Cabin: Stack two pieces of fuel wood parallel to each other, then stack two more across the top at a right angle. Place tinder and kindling inside like you’re building a mini log house. This method produces a longlasting, steady burn.
Give your fire structure plenty of air space. I’ve noticed a lot of beginners pile on too much wood at first, which chokes the flame. Build in layers and add more wood as the fire gets going. If you’re camping with kids, having them help arrange the kindling and logs (with supervision) can be a fun way to get everyone involved and teach fire safety from the beginning.
Circular rock rings, if provided, act as a basic fire barrier. Always clear away any leaves, pine needles, or branches from the area directly around your fire setup for added safety. If the ground is wet, starting your kindling atop a dry bark slab or larger stick can help everything catch quicker too.
4. Lighting the Campfire Safely
This is the exciting part. But also where things can go sideways if you rush. Start by lighting your tinder on several sides with a long lighter. Most of the time, it just takes a few seconds for the flames to catch and work their way up through the kindling.
Lighting Do’s and Don’ts:
- Light the fire from the upwind side so the flame moves inward.
- Never use gas, lighter fluid, or other accelerants. It keeps things safer and the fire smells better.
- If it’s windy, place your body to shield the flame without getting too close.
- Keep a bucket of water or a shovel nearby in case you need to put out a wayward spark.
Once your fire is burning, let it stabilize. Add bigger pieces of fuel wood gradually instead of tossing on a full log right away. If the fire starts to die down, carefully use a poker or long stick to gently stir ashes and reshape the logs so air can reach the embers. This technique is great for a quick flame up and can help extend campfire time if you’re watching the stars or telling tales late into the evening.
5. Enjoy Safely: Maintain and Monitor
Hanging out around the campfire is what it’s all about, but a fire left unattended isn’t just risky; it’s against the rules in most campgrounds. Always keep an eye on your fire until it is completely out.
Campfire Safety Habits:
- Never leave kids or pets unsupervised around the campfire.
- Only burn clean, dry wood; no trash, plastics, or food waste.
- Use long handled tools for stirring or moving logs.
- If sparks escape, use your water bucket or shovel to smother them right away.
Keep your fire low and manageable. A three-foot flame is usually enough for warmth and s’mores and won’t get out of control. For extra peace of mind, designate someone as the “fire watcher” for each camping session. Rotating this duty helps everyone stay sharp after a long day on the trail.
If you notice weather conditions changing, like a breeze picking up or a dry spell settling in, think about letting your fire go out earlier than you ordinarily would. Sometimes the safest move is simply deciding you’ve enjoyed it enough for one night.
6. Extinguish the Fire Completely
Packing it in for the night? Putting out your fire totally is one of the most important campground responsibilities. I always start the process while we’re still hanging out so nothing is rushed.
Steps for Safe Campfire Extinguishing:
- Sprinkle water slowly over the fire, not just dumping it all at once; listen for the hissing sound.
- Stir the ashes and embers with a stick or shovel until everything is wet and cool to the touch.
- Repeat as needed until the fire ring or pit is cold; no heat, no steam, no glowing bits.
If your site has a provided metal fire grate, place it over the pit when you’re done as an extra barrier. Never leave until you’re sure it’s out. Smokey Bear stickers aside, this step is genuinely super important for everyone’s safety. More tips on this from the US Forest Service Smokey Bear site.
Sometimes, campground staff will make morning rounds checking firepits. If you know it’ll be cool or raining overnight, still go through the full process above each time. Wildfire prevention is everybody’s job, and it only takes a second for one leftover coal to become an issue.
Common Questions for New Campers
How do I know if there are fire restrictions?
Check with campground hosts or rangers when you check in. If you’re traveling, the website for your state’s parks or fs.usda.gov will have current updates.
What if I can’t find dry wood?
Carry a small bundle of kiln dried firewood in your RV’s storage compartment or invest in a bundle from the camp store. Never strip wood or branches from live trees; it’s not allowed and doesn’t work well anyway.
Are propane fire pits safer?
Propane fire pits are allowed in many places where wood fires are banned, and they’re cleaner and easier to put out. They’re a smart buy if you camp in drier or wildfire prone areas a lot.
How do I keep smoke out of my tent and off my clothes?
Arrange your seating upwind of the fire so smoke moves away from the group. Ventilate your tent well and store extra clothes in bins or zipped bags to keep that smoky scent at bay. Dry, seasoned wood smokes less; avoid throwing in pine needles or damp leaves that add to the problem.
Your Campfire Game Plan
Every trip, we’ve found that a safe and efficient campfire is mostly about planning ahead and following some simple habits:
- Always use existing fire rings or pits.
- Have dry, local wood and the right gear ready.
- Pick your fire structure and light it carefully.
- Keep an eye on the flames. Never leave a fire by itself.
- Put it all the way out before you turn in for the night.
Your evenings around the campfire are what camping memories are made of. Making them safe and smooth just adds peace of mind. Happy camping, and I hope these tips help your next trip run even better! Got your own rituals or clever campfire tricks? Feel free to share them next time you hit the trail and keep spreading the word on fire safety!